I had an exact plan what to sew in August, and then the Chai Shirt and Dress by Kennis from Itch to Stitch came along and I just had to add one more make to my To-Sew list.

The Chai Shirt and Dress is a fitted shirt/dress with a button placket in the front and a wide waistband just above the smallest point of the waist, elongating the legs. You can choose to make the Chai with or without sleeves – the sleeves are gathered at the top and designed to be a little slimmer than the shoulder, making broad shoulders slimmer and slim shoulders wider. The back is shaped by two waist darts.
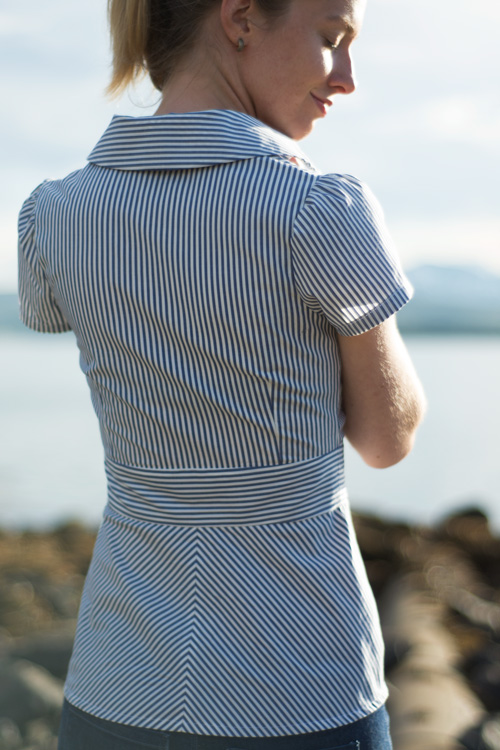
To be honest, most of the time I’d rather shy away from patterns having gathers below each bust. I have seen many examples where this wasn’t very flattering, it can easily accentuate the bust in a strange way or make it look like your bust is too small for the top. But when seeing Kennis’s pattern I didn’t mind the gathers at all and thought it was really cute.
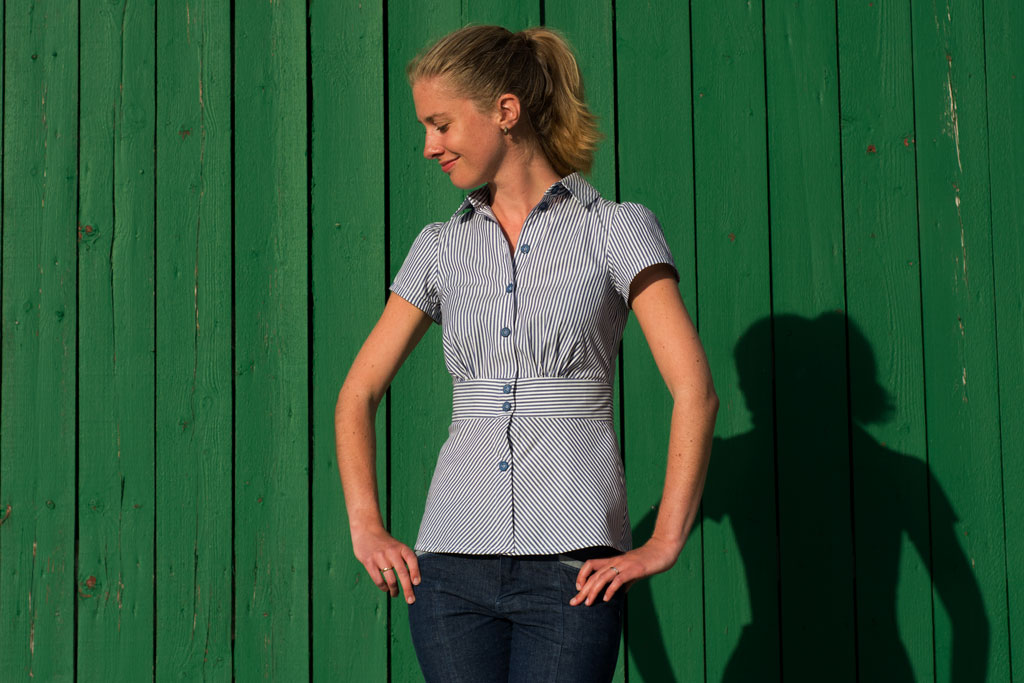
Since this pattern is very fitted, it is essential to go exactly by your measurements and to make a muslin. Trust me. You really want to muslin this pattern! Especially when using woven fabrics without any stretch it shows easily when the fit isn’t right. The good news: Making a muslin is done very quickly! You only need to cut the front, back and one set of waistbands, and ideally a short skirt, too. And you’ll need to cut the sleeves, especially if you’re like me and know that you often have to adjust the shoulder area. Just baste it together and you’re done!

I muslined a size 00 with a B-cup (yes, like many of Kennis’s patterns, this pattern comes with different cup sizes!). In my case the gathers were sitting right under the bust and the waistband ended way higher than the smallest point of my waist. And I couldn’t move my shoulders to the front without feeling a little pain of the seam cutting into my shoulders. Otherwise the fit was pretty spot on!

My solution was to lengthen the bodice by 2 cm, a little over 3/4″, and the skirt by 1 cm, a little more than 3/8″. I also widened the shoulders by 1 cm / 3/8″. And I think this is all I needed to get a great fitting shirt! I hemmed the skirt part with a smaller seam allowance than intended, so adding 2 cm to the skirt might have been even better – but I definitely like it the way it is. The waistband still ends a tiny bit above my smallest part of the waist, but I think it looks better this way – I wouldn’t have liked to lower the gathers even more.

Already while contemplating if I should sign up for the test or not, I thought of this striped Egyptian yarn died cotton shirting in my stash (similar to this one). I bought it in November 2015 from Miss Matatabi, while testing the Cheyenne Tunic by Hey June. The thought was to make another Cheyenne, but that didn’t happen. And now I’m glad it didn’t! The idea of playing with the stripes was intriguing the second I saw the pattern.

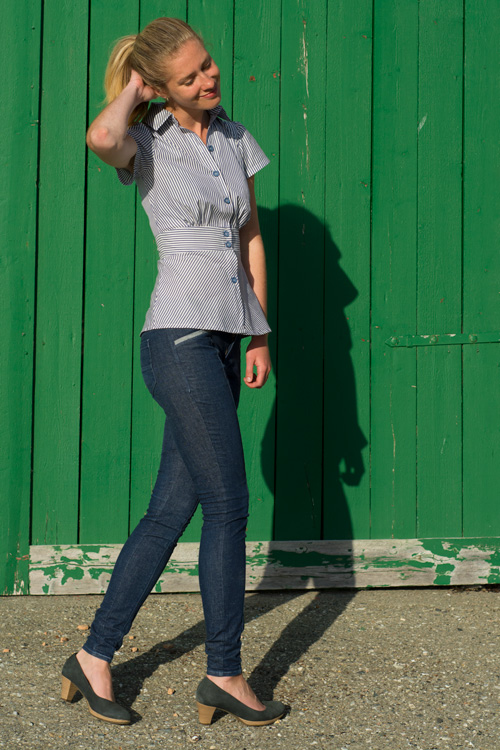
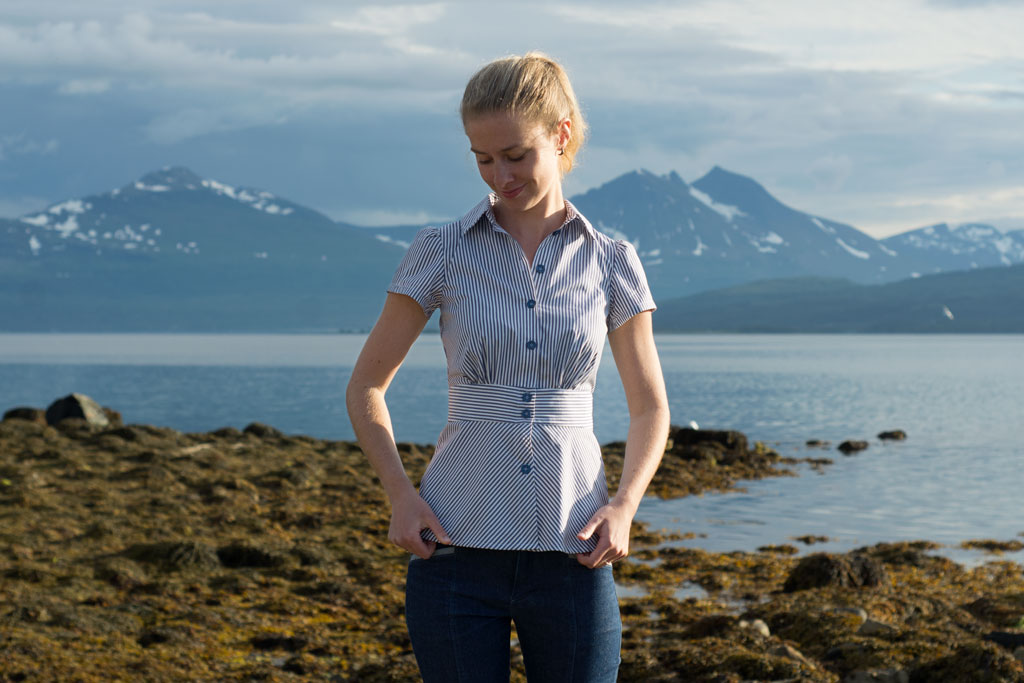
My first thought was to have vertical stripes everywhere, except for the waistband and the collar, where I wanted to use horizontal stripes. Just before cutting my fabric I started thinking of including diagonal stripes, too. I was a little afraid of mixing horizontal, vertical and diagonal stripes, but no risk, no fun, right?
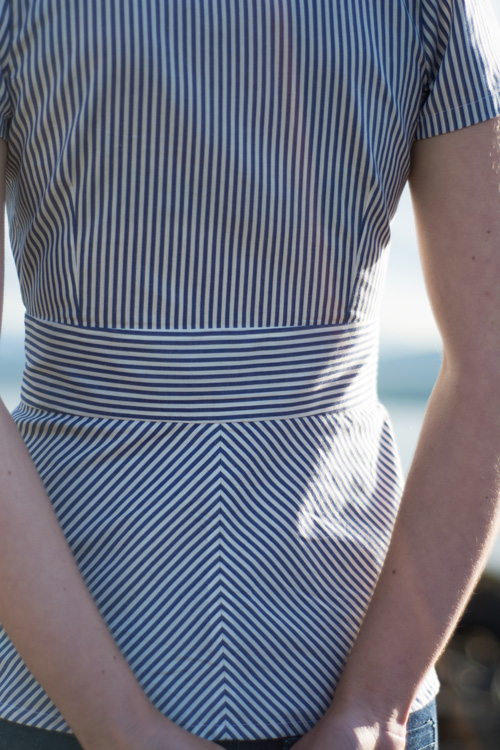
And I’m so glad I dared! I think this shirt is much more fun and unique the way it is now! Keep in mind that the seam on the back skirt part is not part of the original pattern. I added it to be able to have diagonal stripes around the whole skirt.
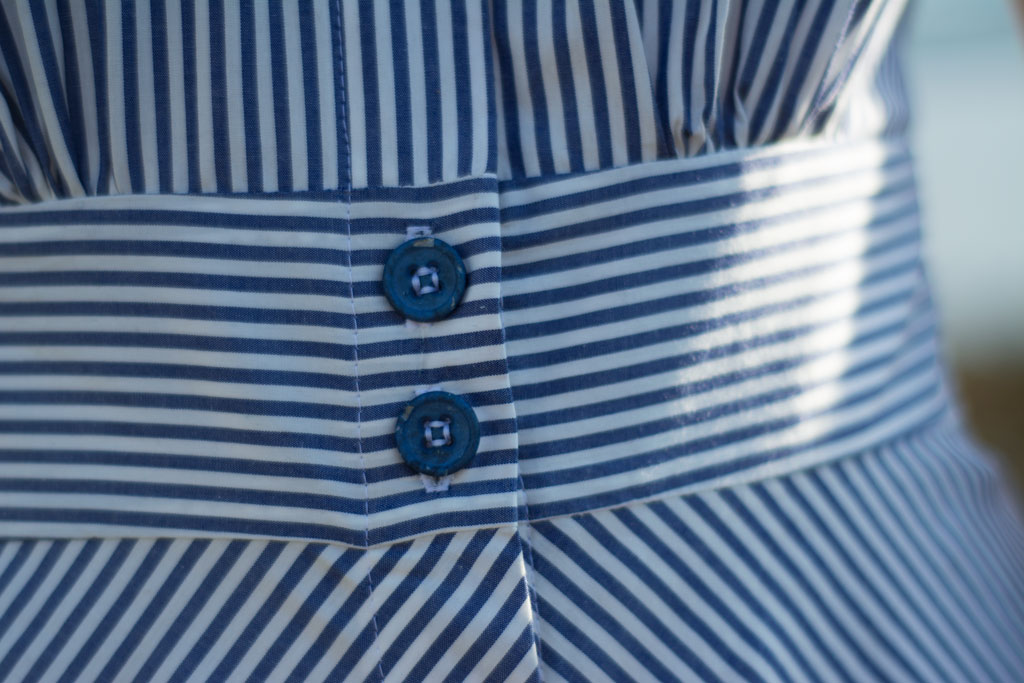
Matching the stripes wherever possible wasn’t as hard as it might look. The stripes are thin enough to make matching easy and the fabric is very easy to work with – stable, but with a tiny bit of give, making it possible to “forcing” the fabric to fit wherever the stripes where off by 1 mm or so. I made it a point to match the skirt at the middle front and middle back, matching the side seams wasn’t possible. I wanted the waistband to match, too, and i wanted the collar to be perfectly horizontal. Matching the back waist darts was important to me, too.

It might be questionable how smart it was to have the ambition of cutting and matching stripes perfectly, especially since I knew how limited my time was. But sometimes, when you have an idea, you just have to go with it …
I wanted a very clean finish on the inside of the garment. Since using French seams when stripe matching can proove a little difficult, I only used French seamed on the non-matching side seams. I chose to use my pinking shears on all the other seams. After that I folded the edge under, hiding the raw edge of the seam and sewed a straight seam right over it. I know. One more technique that’s not the fastest! The only exception are the sleeves. Because of all the gathers at the sleeve cap I chose to overlock the seams.
The instructions give you the choice of attaching the inner waistband and the inner undercollar by stitching in the ditch or by slip stitching the seam by hand. It’s not a secret that I don’t love sewing by hand. But this time I chose to attach the lower edge of the inner undercollar and the waistband by hand, making for a beautiful finish on both sides.

In hindsight I should have considered moving the buttons a little bit and to add a second button to the skirt, sewing the upper buttonhole closer to the waistband. The shirt is tight and the front can easily gape a little, making the right button placement essential.

I love wearing this shirt and I’m sure that I’m going to wear it to work very often. I like how sewing for myself gives me the possibility of choosing just the right balance between professional and being young and playful. And i think this shirt does just that!
You can buy the Chai here – it’s on sale for a week! And don’t forget to check out Kennis’s blog post about the Chai, where you can find all the tester versions!
– This blog post contains affiliate links. However, all opinions are, as always, my own. –


This shirt is so impressive- your stripe matching is on point and I love all the attention you paid to the little details! Thanks for the great and thorough review!
This looks really good! I was on the fence about buying it and I’m going for it – it looks super cute and fits so well. I hate making a muslin (I’m lazy) so thank you for stressing that I should.
[…] a Vientiane Skirt, a La Paz Blazer, a Zamora Blouse and a Lindy Petal Skirt, a Belize Skort and a Chai Shirt. That are quite some Itch to Stitch […]