If you’re active on Instagram, you have definitely seen all the gorgeous Fibre Mood patterns popping up on Instagram every other month. And chances are, if you’re like me, that every time you thought: “I should definitely try Fibre Mood myself!” – and never did, since our sewing lists are never-ending.
But a few weeks ago I realized I was able to join the wonderful group of sewists who sew a sample of one of the new Fibre Mood patterns every time a new issue of the magazine comes out. And I immediately knew that was exactly what I needed to finally try Fibre Mood, too.
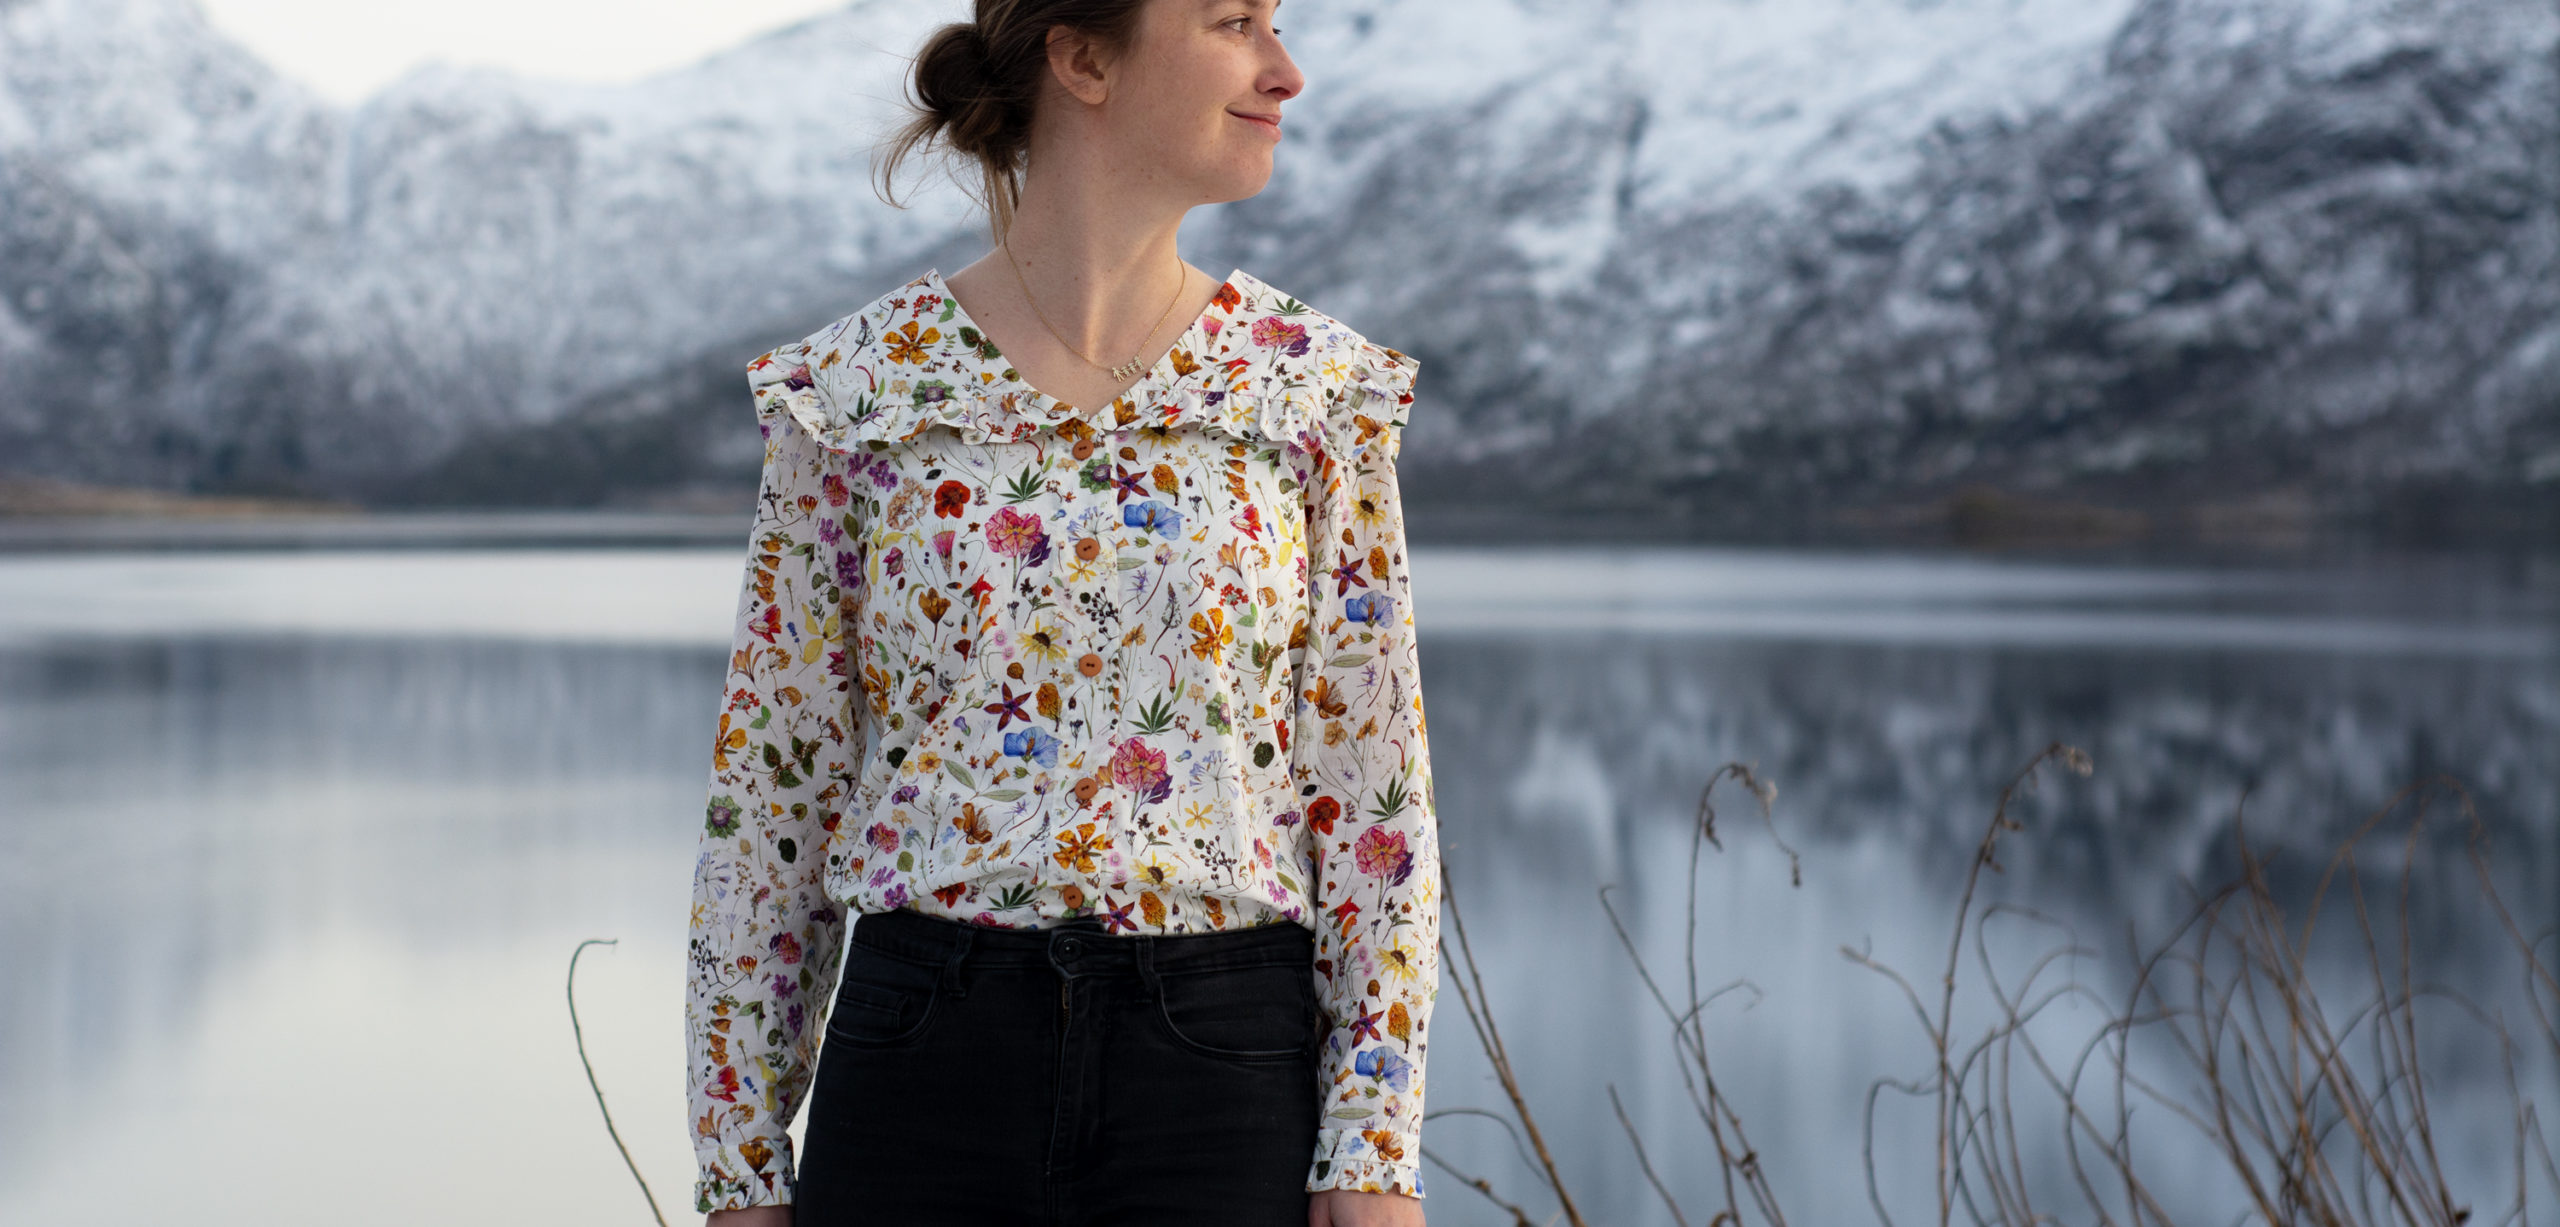
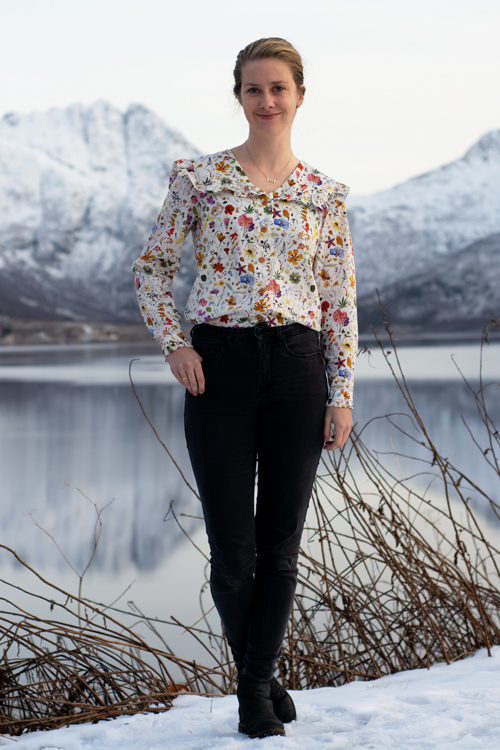
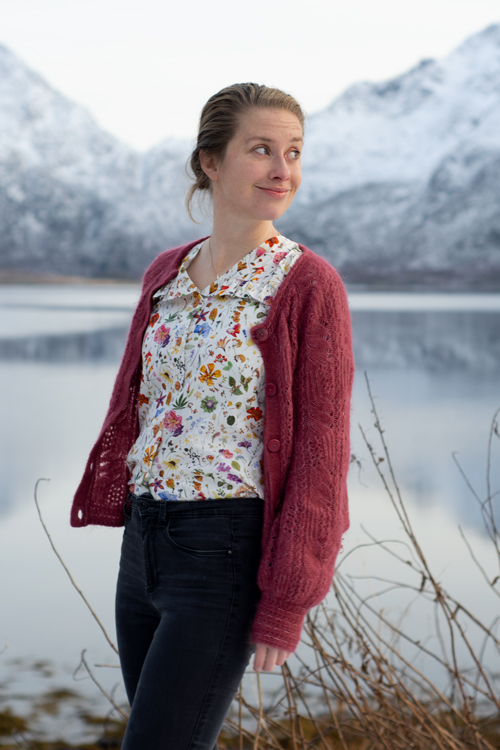
Today issue 17 of Fibre Mood comes for sale and I chose Gladys as my pattern. Gladys is a dress or blouse with ruffles all around the chest, a button placket, V-neck and long sleeves with cuffs. I knew exactly which fabric to choose – the last floral Liberty Tana lawn in my stash. I think this modern floral fabric is perfect for this pattern: The floral pattern compliments the ruffles, while the white fabric base and the not very traditional pattern are a nice “counterweight” to the ruffles.
I was pleasantly surprised by the Fibre Mood pattern itself and the instructions. The pattern can be printed with layers and everything is very nicely designed. The instructions are thorough and easy to follow, though maybe not as lengthy as the instructions of some of my favourite indie designers. Everything fit together perfectly, too.
However, even if in the magazine Gladys is shown both as a dress and as a blouse, it’s mainly a dress pattern. That means you have to lengthen the upper part of the dress to get a proper blouse length. It is mentioned in the instructions, but I would prefer an actual pattern piece.
But even if sewing a blouse meant altering the pattern pieces, it wasn’t a big deal. As you can see in the picture below, I opted to hem my blouse slightly rounded in the front and back. I rarely wear my blouses untucked these days, but if I do, I think a rounded hem looks a little more elegant than a straight one.


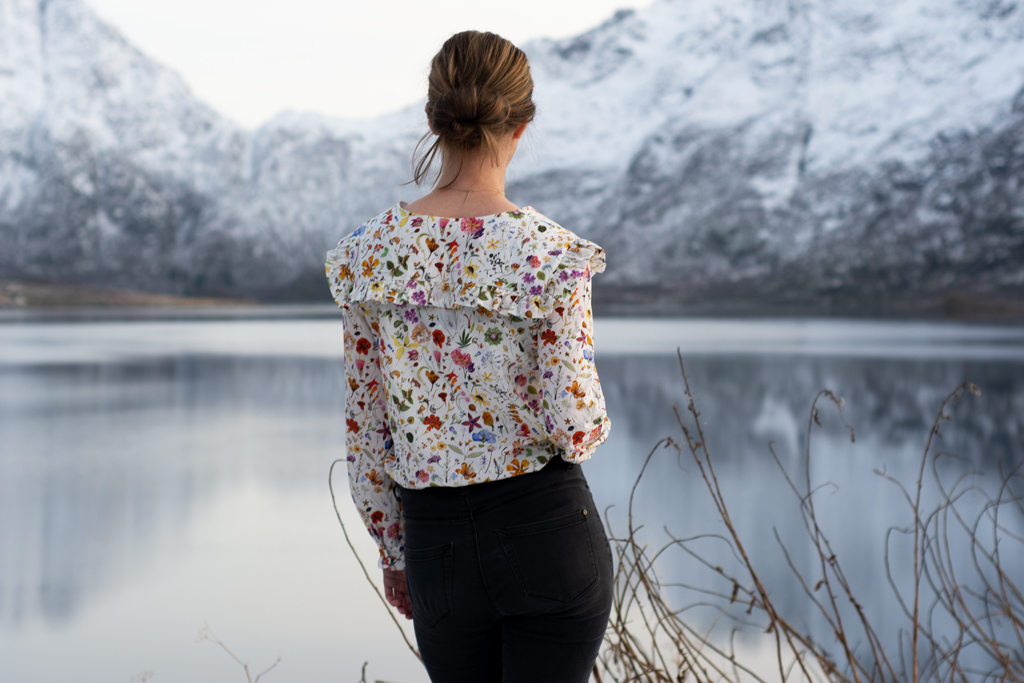
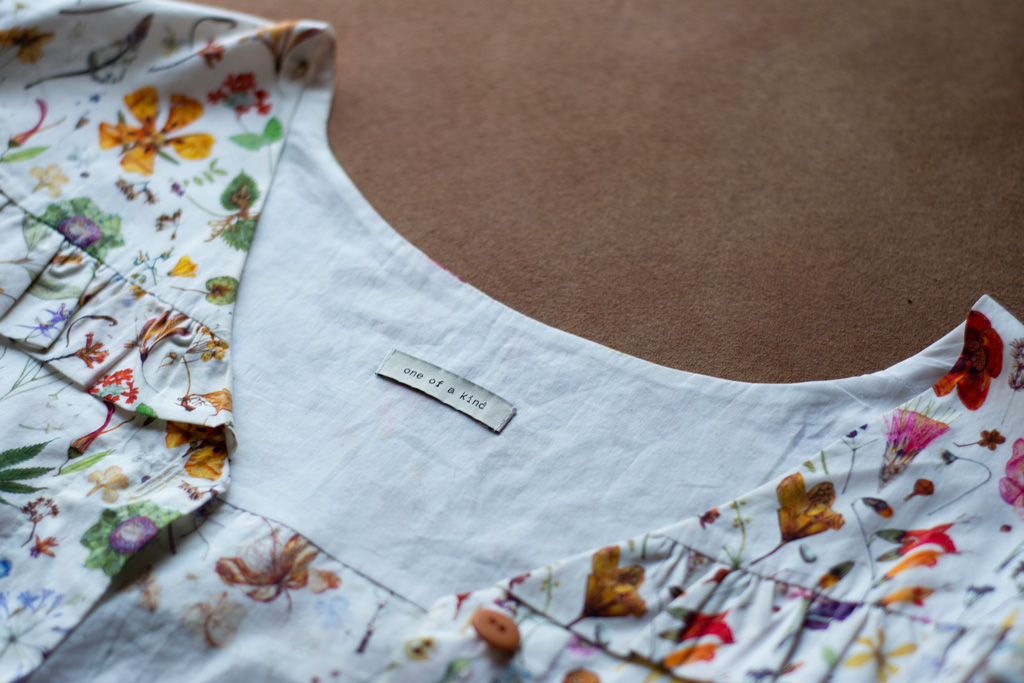
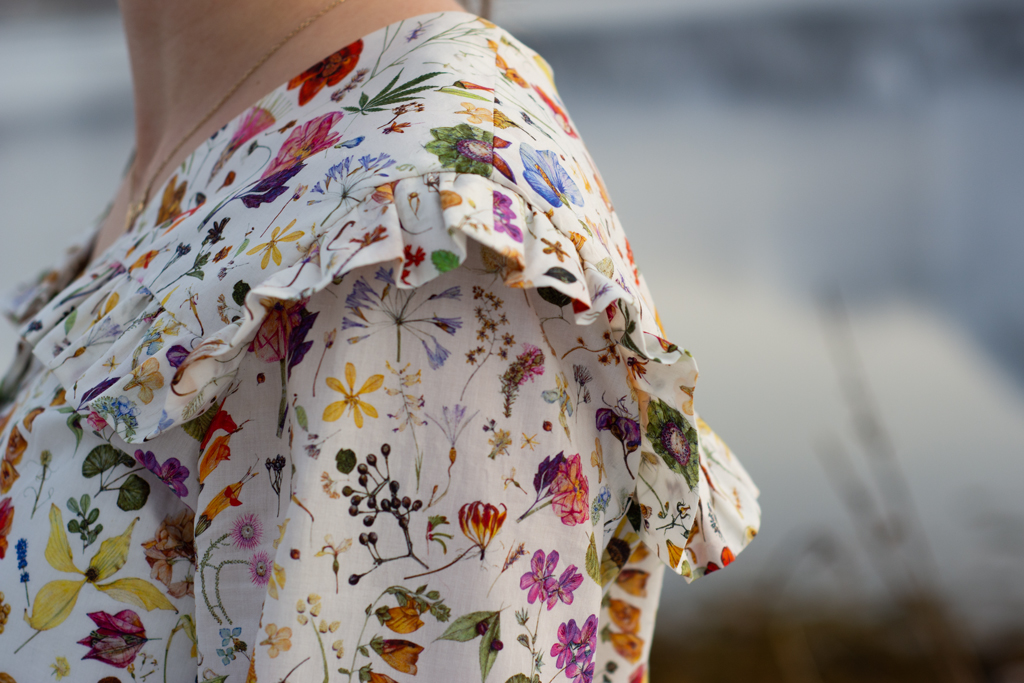
A few other changes to my blouse, were simply owed to my personal preference: There are a lot of seams inside the blouse, due to the ruffles added below the front and back yoke. As I really like a clean finish inside my garments, I decided to cut my yoke double and add a yoke facing. That way the yoke seams and the shoulder seams are hidden. The neckline is supposed to be finished with bias binding – but since I added a facing, I could omit that part. In case anyone would like to try the same: I sewed the upper and lower front and back of the blouse together and added the ruffle. I sewed the front and back yokes and yoke facings together at the shoulder seam, too and pressed the seam allowance of my front yokes in place. Afterwards I sewed the yoke facing and the blouse itself together along the neckline, right sides facing. At the same time I folded the button placket as instructed and made sure that my front yoke and the edge of the button placket overlapped.
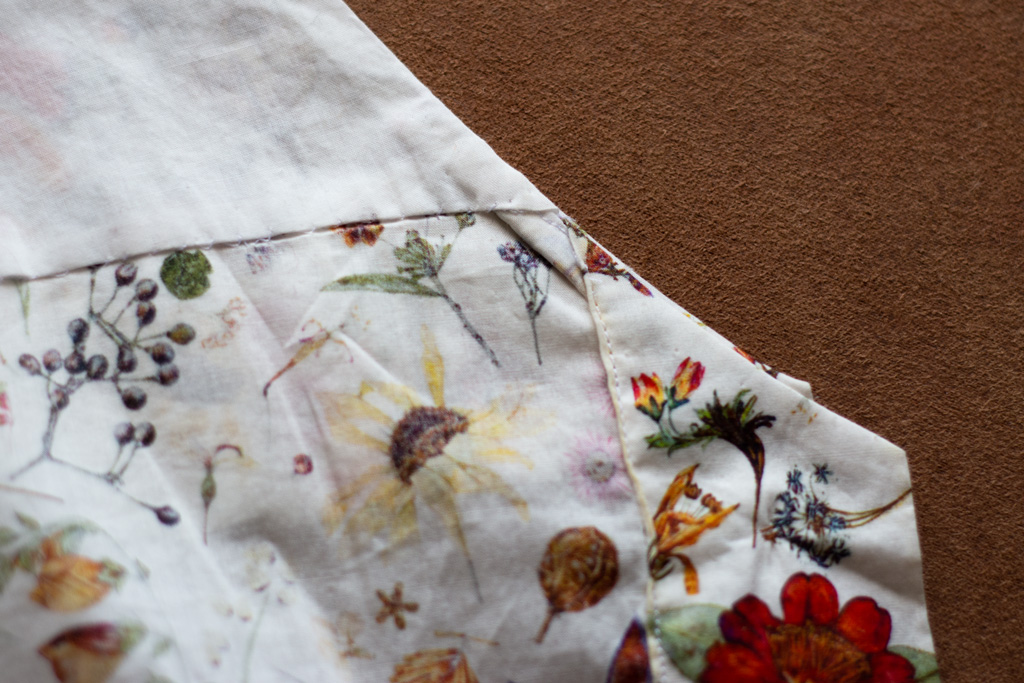
I ended up with a tiny bit of visible seam where the front yoke and the button placket meet. That could have been avoided by altering the button placket slightly to overlap more with the yoke. However, I simply added a tiny piece of Hong Kong binding to that area and it solved the problem nicely.
Last but not least I sewed the back yoke facing to the seam allowance of the back yoke and lower back. I could simply use the Burrito method for this. The same wasn’t possible for the front yoke, since the edge of the yoke facing was already attached to the main blouse along the neckline. I decided to handstitch the front yoke facing in place, but I could have topstitched it in place, too. Simply make sure to get the ruffle out of the way, and the stitch line will be hidden underneath the ruffle on the front.
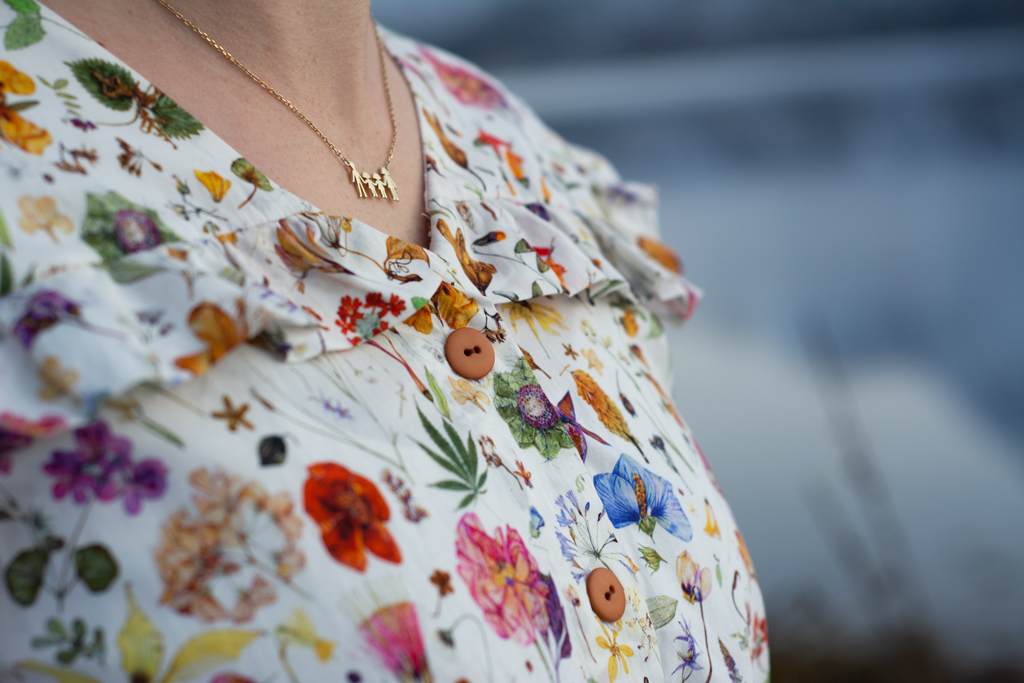
I made a change to the button placket, too: The edge of the placket is finished with a serger, but I prefer to fold the edge towards the wrong side. That way the inside of the blouse looks even neater. To be able to do this without ending up with a placket that wasn’t wide enough, I added 1 cm to the edge of the placket while cutting. The placket is supposed to be held in place by the buttons and button holes. However, I decided to topstitch it to the blouse along the edge, since I prefer my button plackets that way.
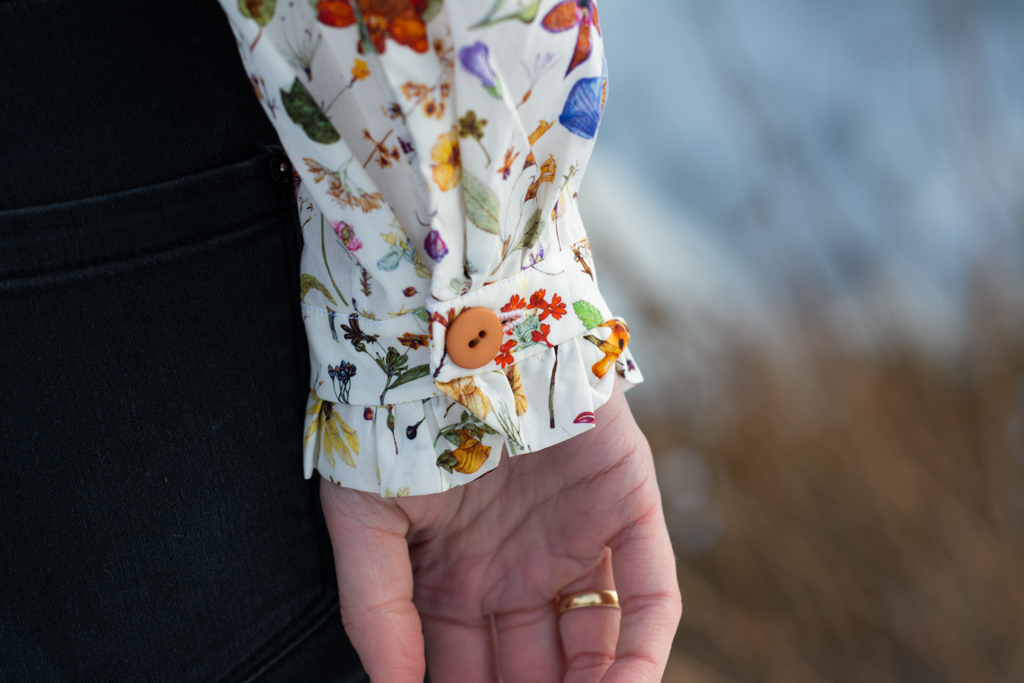
Last but not least, I added a ruffle to my sleeve cuffs. I liked the idea of “picking up” the ruffles at the sleeves, too, instead of only having them at the top. I cut the cuff in two pieces instead of one and added a seam allowance. The ruffle is 1.5 times as long as the cuff and the edges are sewn diagonally, as is the edge of the ruffle at the neckline.
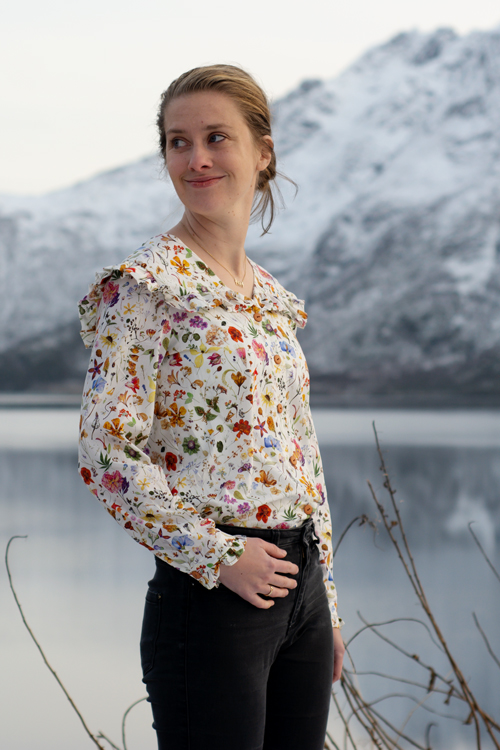
All I might change next time is to move the shoulder seams slightly towards the front and to a slimmer placket. I actually sewed a muslin and thought about doing this, but decided not to. But looking at some of these photos, the shoulder seam should sit about 1 cm more towards the front of my shoulder. Not that anyone is going to notice, though! In regard to the button placket I realized that it is wider than the blouse is designed to overlap in the front. Since my fabric is slightly see-through and the placket is interfaced, it looks a bit whiter than the rest of the blouse. This and the fact that I topstitched the placket made it necessary for me to overlap the plackets completely – and that way the ruffles at the neckline overlap, too …

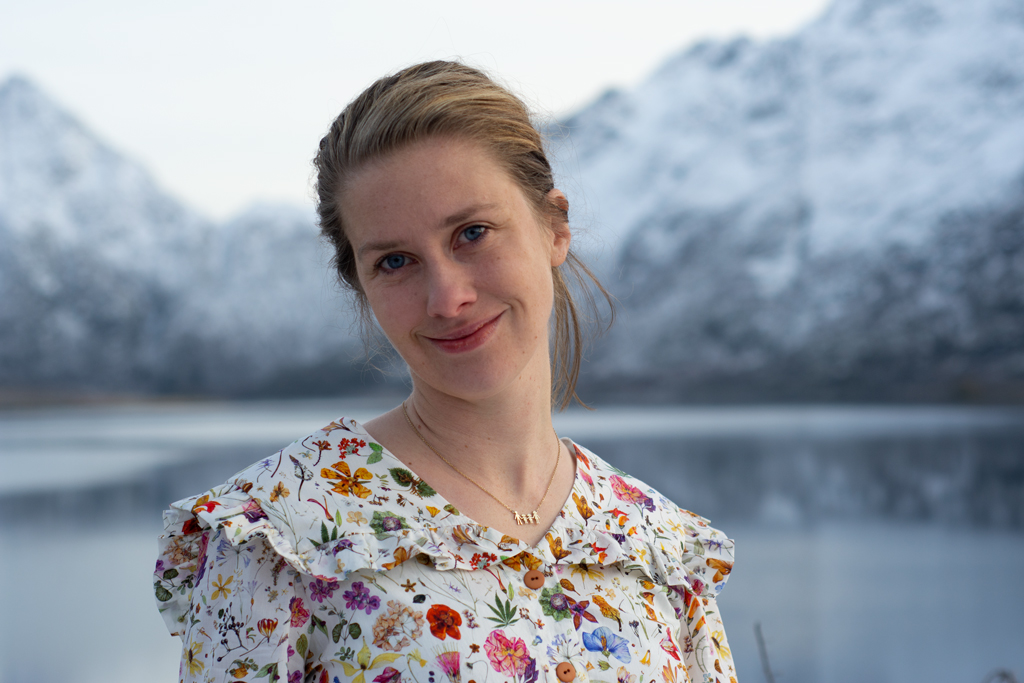
I absolutely love the result and I think I will wear this blouse rather often. This sewing journey has shown me once again that it’s worth it to make all the changes you might want to make and to use quality fabric – the result will be so much better!
– I received Gladys for free in exchange for a review of the pattern. However, all opinions are, as always, my own. I also added an affiliate link to the pattern. The blog post is linked to the Fibre Mood 21 link party. –

This blouse turned out beautifully, and I really appreciate your thoughtful narrative of the sewing details. You’ve provided an invaluable heads up for things I want to consider when cutting.